Help | fullpartner.com
Full Partner  
Full Partner Help Center
Course: 01-1 Content Management Objects
 
Course Home
Course Content
Images  
< Previous
Next >

Images

Location: Web Content/Images

Overview: Web Content/Images is where we store all the images you upload to your database. We use images in many ways throughout the system. You can add images to your articles, course modules, events, emails, and product descriptions, as well as using them for a featured image thumbnail in a variety of presentation modes. We also use them in slideshows and image galleries.

Any image you use, no matter where you use it in the system, will first be uploaded to the Images database. 

See below for steps on how to add an image to your images database.

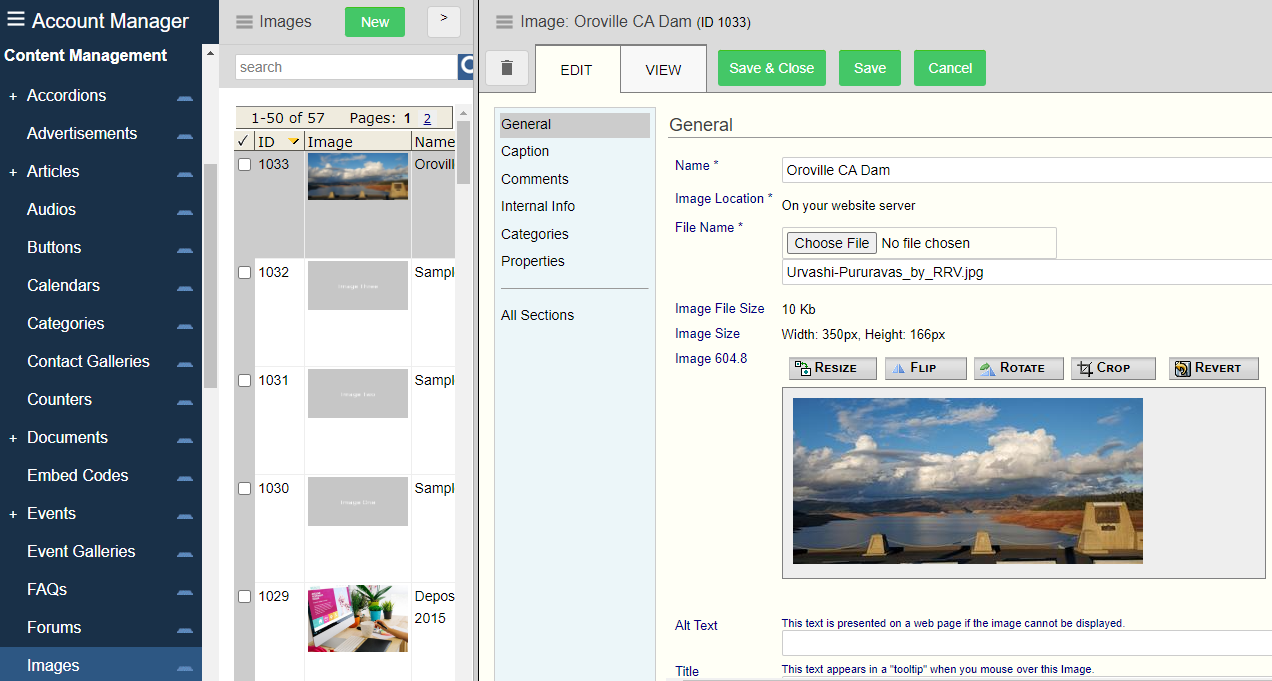
Steps to add an image to your images database:

  1. Go to Content Management/Images
  2. Click New
  3. In the Editor that comes up, give the image a name
  4. Click the Choose Image button to find and locate the image on your computer
  5. Once selected the image from your computer you are back in the image editor and are previewing the image before the final save. Here you can use our default tools to resize or crop if needed before the final save to the database. This can be very useful if you have images fresh off your cell phone that are humongous!
  6. You can then review the following fields listed below, but they are not used in all instances of image displays so they may not be needed. Most people skip this step and go back in and update these fields later if needed.
    1. Alt Text –This field is used to describe visual elements to web visitors who may be visually impaired and using a screen reader. This filed is also used for SEO keywords. Good web practice dictates that you should always have something relevant in the Alt Text Field for your images. Note: If placed within a content object such as an article, this filed usually gets populated in the insert image dialog rather than here in the image editor.
    2. Title – This field shows on mouse over as a “tool tip” to help the reader gain insight to the image description if useful. Note: If placed within a content object such as an article, this filed usually gets populated in the insert image dialog rather than here in the image editor.
    3. Link – If used in certain displays such as galleries or slideshows, and the setting to allowing image linking is turned on in those objects, this is where you will add the link for the image.
  7. Save and Close. After you’ve gone through the above steps, click the Save and Close button to finalize the import and save the image to your database.

Related Topics


Visit the Course Content page for a linked index of the Content Management Objects.


< Previous
Next >


© 2022 Full Partner, Inc.