© 2022 Full Partner, Inc.
Full Partner Help Center
Course: 07 Ecommerce
|
|
Add an Individual Product to a Page |
Add an Individual Product to a Page
Location: Websites Management/Website Settings/Your Website Name /Enter Design Mode -> Column Editor - Add Item Menu
Overview: You can add a product to page to present it on your website.
Summary of Step to add Product to a Page:
- In design mode, be sure you are in Show Headers Mode so you can see the column headers all across the page.
- Find the Pages list, and then click or the page that you want to add the product to.
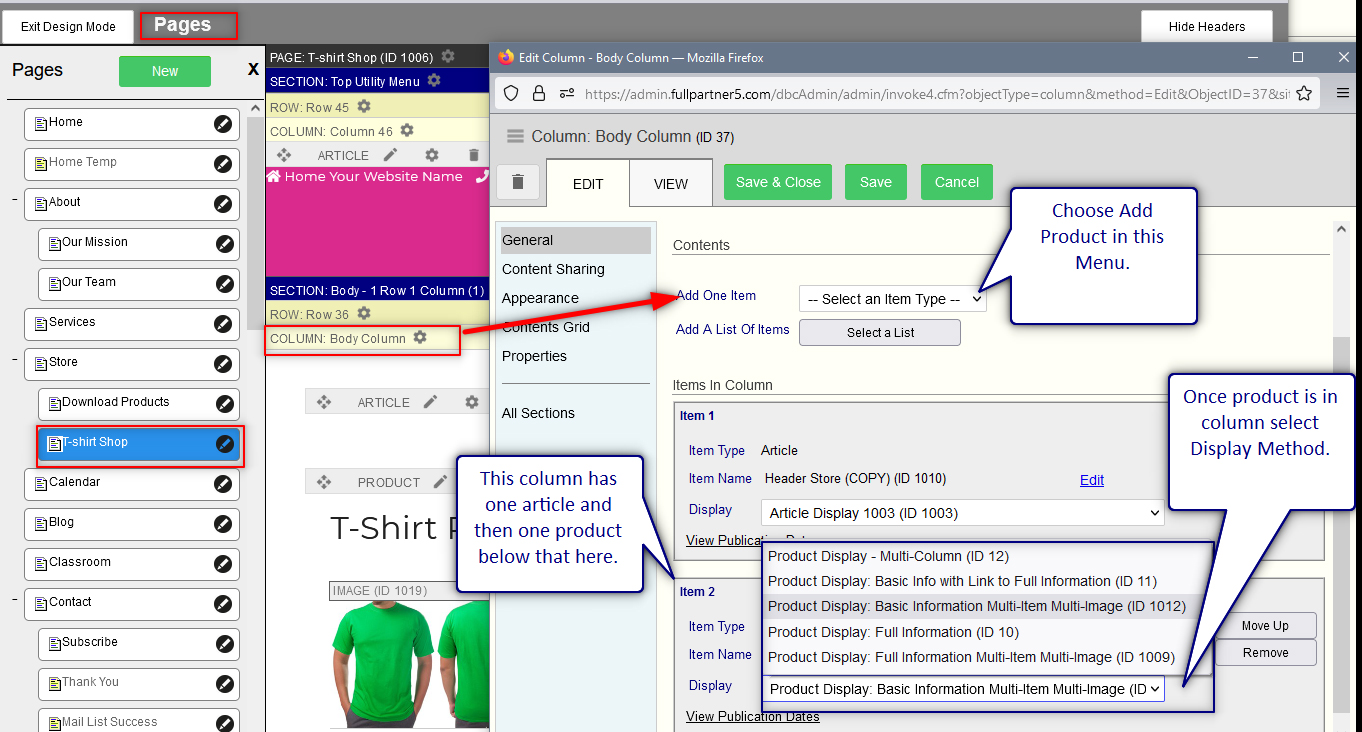
- On the page, find the column you want to add the product to and click the gearwheel in the column header bar to access the column editor. (With updates coming soon, this may also just be the word "Content" in the column header bar.)
- Once in the column editor find the “Add One Item” menu. Open this menu and choose Product.
- This will launch the Products Finder where you can search for and find the product you want to add.
- Click Select next to the product you want to add. This will also save and refresh the website page in the background.
- Review the Display Method menu and set the display method to your desired method, typically you'll choose either: Basic Information with link to register, Full Information, or Multi Image/ Multi column display.
- If you want to add more products to the page, repeat this same above steps.
- When done, click Save and Close in the column editor.
Click to View Infographic of Design Mode with Column Editor and Product Settings
See also: How to Add Content to a Page with the Column Editor for a tutorial video on the basic process.
X